Choice Words & Tasteful Doings
Saturday, 7 November 2020
Guest designer: Stencilgirl
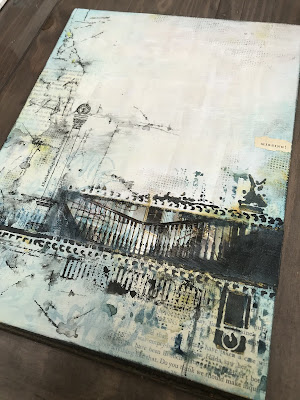
Delighted to be this week’s guest designer on the Stencilgirl blog! Pop over to https://www.stencilgirltalk.com/2020/11/mixed-media-painting-tutorial-with-StencilGirl-stencils.html to see my project, with stencils by Carolyn Dube, Kae Pea & Mary Beth Shaw.
Saturday, 17 October 2020
Gelli journal page
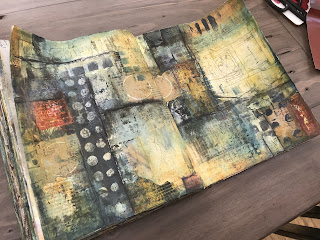
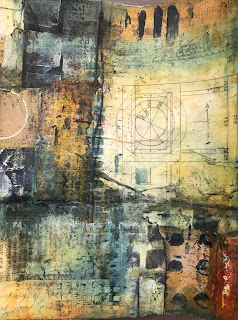
A page in my Dina Wakley journal. I never felt inspired to work in it until recently, isn’t that weird? I think it was a sense of it being ‘too good’, or of me not being good enough. But I finished my Strathmore journal (my favourite journal to work in & the first I’ve ever filled)...
I made this page having taken Stencilgirl’s Soul Mantras online class, so it features lots of Mary Beth Shaw’s collaging and mark making techniques. The patterned paper at the bottom is a torn up gelli print & there’s some juicy red washi tape on there too.
Im finding art journaling, & particularly collaging, a soothing process to engage with in these difficult times. I’ve been pretty upbeat for the first 6th months of the pandemic but I’m increasingly finding it wearing. Seeing how it’s affecting the daily lives of those I love, who are struggling, is also getting harder. Being able to lose myself in a mindless process a couple of times a week is a blessing. Fingers crossed for better times in the coming months.
Sunday, 11 October 2020
Use it up, wear it out
I tend not to clean my craft mats (or anywhere) as often as I should, & because the layers of dried on paint were starting to make them unusable, I took some sticky tape & lifted it off, like I’ve seen done to clean up gelli plates. I got some unexpectedly lovely results. It seemed a shame to bin them, & I found myself packing the tapes away for some future project that I simultaneously knew would never happen.
I layered over the top with some stamping & mark making, & then a layer of matt medium, to take the shine off the tape.
I was pleased with the overall look, and it was easy, quick & mindless to achieve. And most importantly a bit less stuff hanging around!
Sunday, 4 October 2020
A reminder to myself...
I’ve had this fine, floaty lady in my stencil stash for a while & finally got to give her an outing.
I collaged lots of papers & washi tape for the first layer, then stamped & daubed acrylic paint. Over the top, I scraped several colours of Izink Ice, a translucent gel.
I scratched into the top layer of Ice while it was still wet. It gives great texture to your work, & the colours glow like an Instagram filter!
One dry, I stencilled my lady a few times using a Stabilo All Pencil. I went over the outline using a Dina Wakley Scribble stick, which I wet a little to thicken the line.
I finished off scribbling some highlights with a white gel pen & collating some words from a Dina Wakley tissue collection.
I love the dark & grungy feel, it’s so rich & intense!
Saturday, 19 September 2020
ConcerTINa class by Seth Apter
One of the good things about Lockdown has been the increase in online workshops by some of my favourite artists. This week I took a class by Seth Apter. I was lucky enough to take one in person with him last year. He is a great teacher & a lovely, uplifting person. I was booked on another workshop with him when he came to the UK in May - of course that had to be cancelled. But Seth has been busy putting together a series of great, stand alone, online classes to fill the void.
This latest class saw us take a small tin & alter it with distress & ageing techniques.
I had this one in my stash, left over from the great “suspending things in resin” craze of the early noughties - the best before date was December ‘07 😀. Never throw anything away!
After we’d altered the tin we set about making an accordion folded mini book to stow inside it.
It was a lovely class & great to have it there to refer back to. You can still buy it on Seth’s website to watch & do at any time.
Sunday, 6 September 2020
Soul Mantras online class by StencilGirl
I took StencilGirl’s great online class ‘Soul Mantras’ this weekend. It was a lovely, relaxed guide through creating layered, collaged art, using parts that you create yourself with as much (or as little!) meaning as you want to give them.
Saturday, 15 August 2020
Stencilled wall art
After 17 years of living with someone else’s wallpaper, carpet & even wardrobes (bought for £20 off the former owner of our PREVIOUS house, ‘just to tide us over for a few months’) we recently had our tired and tatty bedroom re-vamped. Fitted wardrobes, complete redecoration and all new fixtures and fittings. It was like being on 60 Minute Makeover. Or rather, 6 Week Makeover, which is how long we had to decamp into my son’s bedroom, with all our stuff.
They finished the weekend before the Covid lockdown started in the UK, so I haven’t yet been able to shop for finishing touches (I like to do that in person rather than online & I’m still not going out except for the weekly food shop).
But I knew I wanted something on this wall, to break up the wash of dark teal. My decorator suggested I buy a painting & he would accent it with some of the dark teal paint. And doubtless charge me £200 for the privilege. Err, no thanks.
So I’m currently working up the confidence to paint a large abstract piece for that wall, but I’ve never done anything large before, & these things take time etc, so in the meantime I thought I’d stick with what I know, & work small.
I watched a fab video on using stencils on a gelli plate to create multiple layers in a single pull, & thought it would be good for creating several 4x4 pieces. Naturally, I can’t for the life of me find it now. It might have been by Carolyn Dube, but I’m not sure - if anyone can connect me with it again, I’d be v grateful. I promise I’ll take better care of it next time.
I used Carolyn Dube’s alphabet stencil to randomly stencil letters on the gelli plate using Paperartsy Fresco Finish in Buff. I let it dry, then placed a Prima Moroccan themed stencil over it & stencilled through it onto the plate in teal, blue & copper - colours I thought would match the wall well.
When that layer was dry, I stamped some text using a permanent ink. Finally, I painted a layer of white paint over the whole plate & immediately pulled it up, using inexpensive mixed media paper. It brought all the layers up with it beautifully, and created a print with depth & interest.
For finishing touches, I collaged some tissue paper into the corners & stamped & embossed some textural stamps.
I mounted the paper on cheap 4x4 artist’s wood panels & painted the sides to match the wall. (And, yes, I know I really should have ‘staged’ that bed a bit better. But, meh... 🙂)
We locked down before the blinds could be fitted. Nearly six months later, I still have raggedy paper at the windows. Crack den chic.


